Overview:
This document explains how to interact with the Scheduling Grid in the Astra Scheduling application. This workflow applies to users who have general access to the in the Astra Scheduling system.
Step 2: Check Available Space (Scheduling Grids)
Click the Check Available Space (Scheduling Grids) button on your perspective Scheduling Menu section of the Homepage.

Step 3: Scheduling Grids Calendar
The Scheduling Grids Calendar view populates. Use the key below to navigate this window.

A. Day/Week view - switch between Day and Week view with the buttons at the top left of the screen.
- Note: when in week view, please select a specific room from the list to the left of the page to see what events are taking place in the room for that week.
B. Filter by date – There are multiple ways to filter on the date, such as:

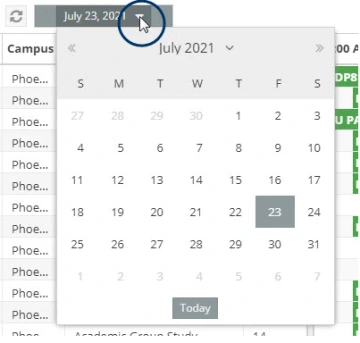
- Filter the date by selecting the calendar icon (see image below) at the top left of the screen.
- To view day to day, click the arrow icons to the side of the date.
- Enter a date quickly in the text field by using the format mm/dd.
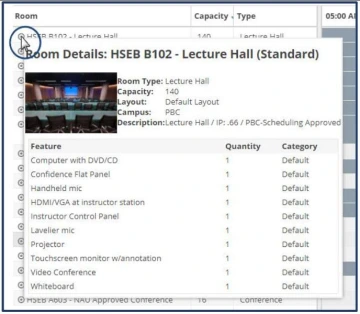
C. Bullseye icon - Hover the cursor over the bullseye icon to display room details, such as room type, capacity, and resources.

D. Blocked rooms and times – Sections of the calendar that are gray and unavailable to be scheduled because it is either before/after building hours or the space has not been released due to classroom scheduling timelines.

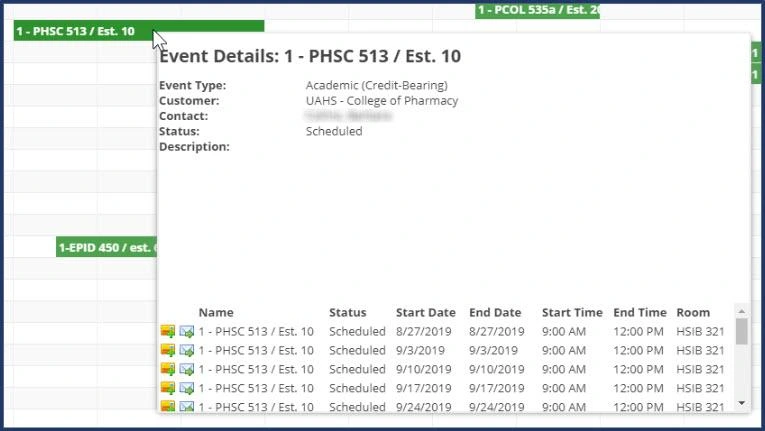
E. Hover over the scheduled event – To learn more information about a scheduled event on the Scheduling Grids Calendar, hover the cursor over the event to bring up the Event Details pop-up window.

F. Choose Calendar/Filter - The “Choose Calendar” option at the top will display different room collections in the selected building. The “Filter” option to the top right will allow you to display the different buildings on our campus.


