Overview:
These instructions describe how to use the Astra Scheduling application to schedule curriculum. This workflow is for users who want to make requests in the Astra Scheduling system as Academic Coordinators or Curriculum Coordinators.
Step 1: Astra Schedule
Navigate to SCHEDULE.UAHS.ARIZONA.EDU on the browser of your choice.
Log in with your UA Net ID and password using the Log In button or Sign In button (top right of the application screen) to authenticate in the system.
Step 2: Requesting Your Academic Sessions
Click on the Request an Academic (Credit Bearing) Course button on the Academic Scheduling Menu section of the Homepage:

Step 3: Add Details
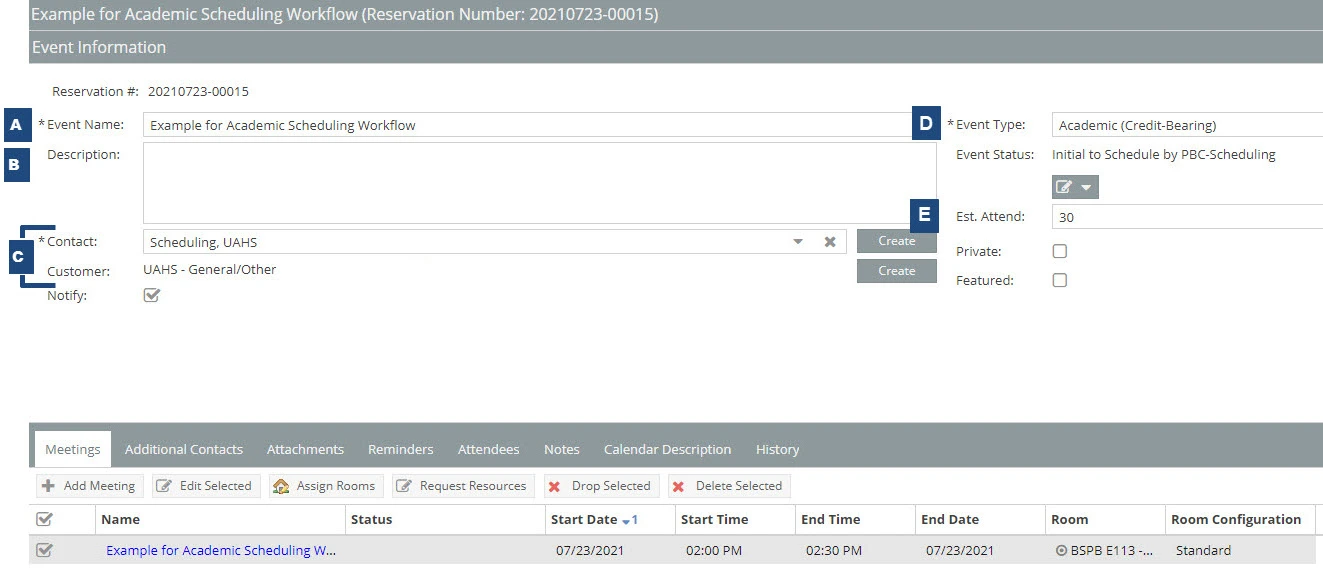
Build out the course meeting components.
A. Event Name: Enter the course number, name, and expected attendance. (i.e. MED 808 - Life Cycle Team Learning - est. 35 or PT 685 - est. 68)
B. Description: Enter various information to assist in placement; including room preferences, room types, and what type of technology is needed or will be used in the room. Please note that technology requests need to be made to the respective IT dept.
C. Contact & Customer: In the contact field, start to type your last name. The customer field auto-populates your name and Customer department or college association.
D. Event Type: Select Academic (Credit Bearing) or Administrative/Academic Related. The other selections of; Student and Special Event are used in other parts of the application.
E. Est. Attend: This field reflects the student enrollment numbers for the course. Schedulers typically include supporting faculty members.
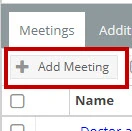
Step 4: Add Meeting
When the Add Meeting button is selected, the meeting(s) window displays.
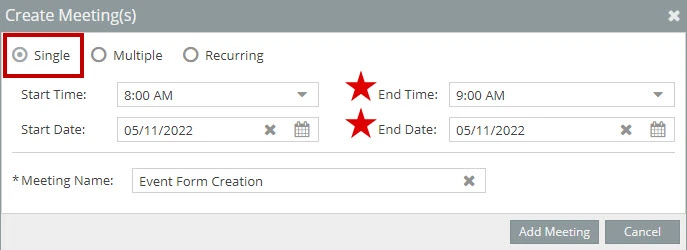
Here you will add your meeting details under one of three schedule types: Single, Multiple, or Recurring.
A meeting that takes place on one day or multiple meetings that occur as part of the same event, without a set date and/or time pattern.
a. Time: The system defaults the end time a ½ hour after the start time.
b. Date: Verify the single event has the same start and end date. The single event should not span over more than one day.
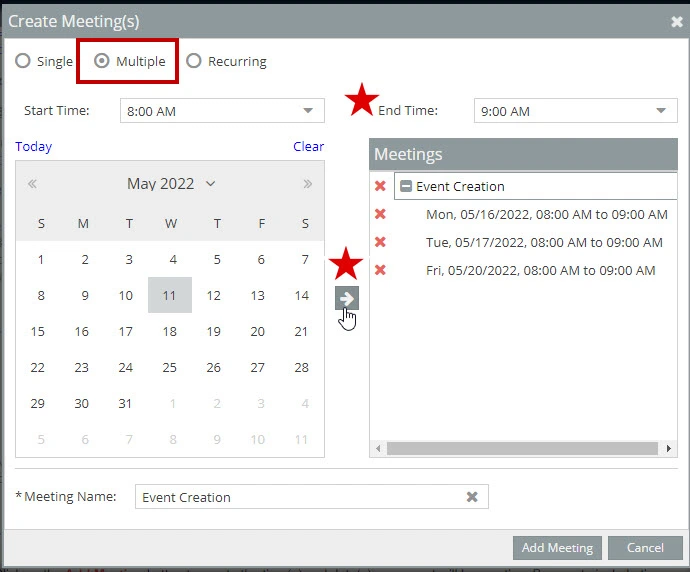
Multiple meetings selection is for grouping of non-patterned sessions.
a. Select the dates on the left and move them to the box on the right by clicking the arrow button.
b. To schedule multiple dates at different times; select the dates first, select the times, and click the arrow button. Continue to add more dates with different times and then click the arrow button.
- To remove a date that was previously selected, click the date again.
- To remove a meeting from the list, click the red X in the meeting box.
A series of regularly scheduled meetings (ex: every Monday and Wednesday at 2 pm, every second Thursday of the month at 9 am).
Please confirm the following fields when populating a recurring meeting:
- End Time - The system defaults the end time a ½ hour after the start time.
- End After - The system defaults to the “End after” field with 10 occurrences. If this is not ideal, then click the “End by” and select the date.
- Recurrence Summary - Review this field and confirm all information is accurate before clicking Add Meeting button.
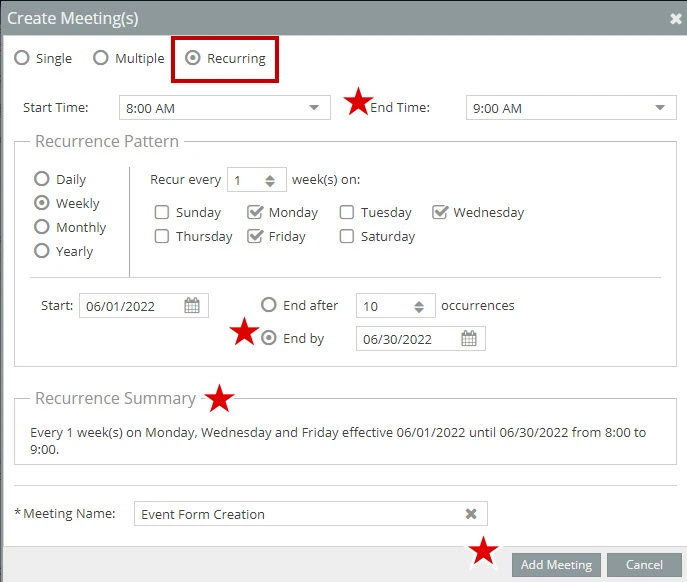
Select the Add Meeting button within the window when done.
Step 5: Adding Rooms
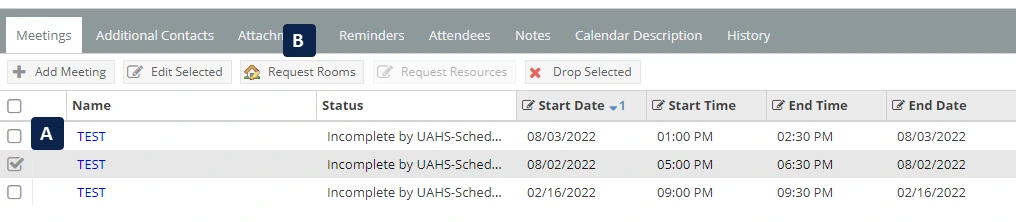
Select the meeting(s) for which you would like to request rooms.
Request Rooms:
- (Phase 1 scheduling) During the open scheduling window, request rooms by providing the primary and secondary room preferences or room types in the description field. For example, "HSIB 444 & 445- joined" or "Lecture style classroom"
- (Phase 3 scheduling) After your academic scheduling window has closed, request rooms by selecting the Request Rooms button (B), located on the meetings tab on the lower part of the screen. Make sure you have all the meetings checked (A) before clicking the Request Rooms button.
This window displays where you can select and request your desired room(s). Use the key below to navigate this window.
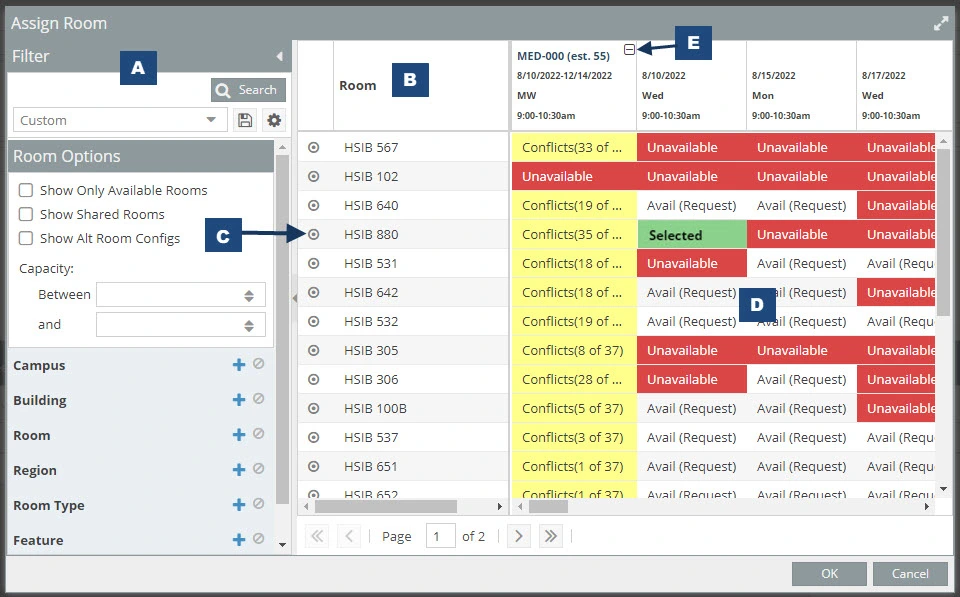
A. Filter - Filter in different building regions of rooms. Remove any defaulted filters to view all scheduled areas or enter search criteria for specific areas.
B. Rooms - Click on the room column header, and this displays the rooms in sequential order.
C. Bullseye - Hover the cursor over the bullseye to display room details, such as room type and capacity. Note: choose a room with the correct capacity for the event meeting. Safety first!
D. If a room is reserved, it displays the conflicts in yellow and the unavailability in red.
- If you click the yellow cell, the system displays which event(s) conflict with your event. Here you have the option to resolve some or all the conflicts.
- To view the conflicting event limited details, hover your cursor over the event link in blue.

E. If you have multiple meetings, click the plus (+) button at the top right corner of the event to show or hide all the meeting dates and times you are requesting.
Step 6:
Saving your Reservation
After confirming your event information, first Save and then Save and Close your event (See Image “A or B”).
A.

B.
